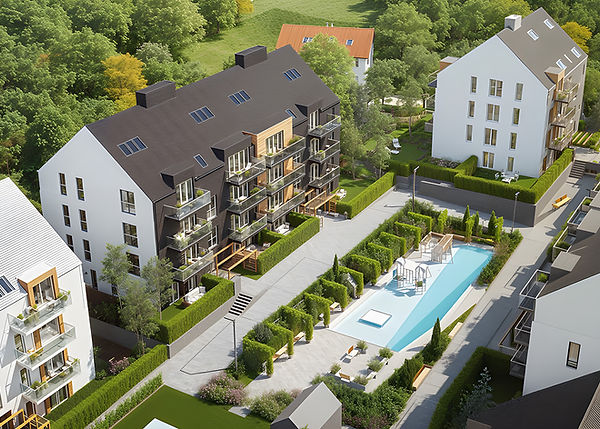
How to Create 3D Visualizations? A Step-by-Step Guide
3D visualizations have become an integral part of industries such as architecture, real estate, interior design, product design, and e-commerce. They allow for the realistic representation of objects that don’t yet exist—in an attractive, understandable, and engaging way.
But how exactly are professional 3D visualizations created? What does the process look like from A to Z? Below, we’ve outlined all the steps, step by step.
How is an interactive model different from a traditional one?
The process of creating a 3D visualization begins with understanding the client’s needs. It’s crucial to gather materials such as:
- 2D projections or CAD files,
- 3D models (if available),
- guidelines regarding color, style and atmosphere,
- inspirations and visual references,
- information about the purpose of the visualization – whether it will be an architectural, interior or product visualization.
This is the stage that determines everything else – the better the project is described, the faster and more efficiently it will be implemented.
2. 3D modeling
Next, we move on to building a digital model. We create a 3D model of the object—a building, interior, product, or other form. We use specialized 3D software, such as:
- Blender
- 3ds Max
- SketchUp
- Cinema 4D
- Revit (for architecture)
Modeling takes into account every detail: shape, window divisions, furniture, textures and environmental elements – depending on the type of visualization.
3. Texturing and materials
Once the model is ready, it’s time to add realistic textures—for example, wood, glass, concrete, fabric, or metal. Reflection, gloss, and roughness maps are also applied to make the objects appear real. This is where the project gains character and quality.
4. Lighting and camera setup
- Lighting has a huge impact on the perception of 3D visualization. Depending on your needs, you can adjust:
- daylight or evening light,
- artificial interior lighting,
- shade and ambient atmosphere.
- At the same time, the camera frames and angles that will best show the project are determined: from the outside, from a bird’s eye view, from eye level, in motion or static.
5. Rendering – i.e. image generation
Once everything is set, rendering begins—a process where the computer calculates all the data and creates the final image. Depending on the complexity of the scene and the quality of the render, this can take anywhere from a few minutes to several hours per shot.
6. Post-production
The final stage is post-production – enhancing contrast and color, adding sky, people, plants, lighting effects, and atmosphere (e.g., fog, sun). Post-production adds the finishing touches to the visualization and often determines its aesthetic quality.
How long does it take to create a 3D visualization?
The implementation time depends on the type of visualization:
- ✔️ Simple interior visualization – 2–4 days
- ✔️ House or building visualization – 4–7 days
- ✔️ Comprehensive estate visualization – 7–14 days
- ✔️ Product visualization – 1–3 days
- ✔️ 3D animation or virtual tour – from 1 week onwards
What influences the quality of 3D visualization?
- Realistic lighting and materials
- Selecting the frame composition
- Model detail
- Post-production aesthetics
- The ability to “tell a story” with an image
Why is it worth investing in professional visualizations?
✅ Increase interest and conversion
✅ Facilitate sales and project presentation
✅ Build a modern brand image
✅ Help obtain client or investor approval
Summary
- Creating a 3D visualization is a multi-stage process that combines design, technical, and artistic skills. A well-executed visualization is more than just an attractive image—it’s a business tool that has a real impact on sales, decisions, and brand image.
- Want to see what your investment or product would look like in 3D?